Sunday, 20 November 2011

Getting ready for Winter pt.2: Fitness

So, those that have done some climbing will know you dont have to be mega fit; you can do no activity, park at the base of the crag and still haul yourself up the rock. Although, being fit is a major advantage for trickier and longer routes. For Winter it is completely different; this is due to the fact that you have the added faff of the walk in. If you're planning on heading to the Ben, you're looking at a 3 hour walk in.

So when it comes down to training, you've got to think - theres no use being able to do one-armers if you cant do the walk in! Yes, work on upper and lower body muscle training, but put plenty of time into cardio for those long days and walk ins. For me, i have put a decent amount of time into getting fitter for this winter; i was alright last year, but i  felt absolutely chin strapped on the descents and on the walk ins we were trying to do quickly (sneachda). But its not all fitness, its what you eat. In my house, we all try to eat plenty of fruit and veg, take vitamins and dont drink too much beer. If you do want to drink alcohol, try spirits like vodka as they dont contain many calorie (unlike beer).

Runs: Every couple of days i will try to go for a short run, this is usually round the racecourse, which is about 2 miles. I dont do these at a particularly fast pace compared to the people who usually blast past me. But it is right for me, which is what counts.

Circuits: These are great for climbing training as you can work on various muscle groups as well as your cardio. For winter this is great as ice and mixed climbing is renown for giving full body pumps. I do the circuits once a week with a bunch of other people from the University of Worcester Climbing and Mountaineering Club (UWCMC). We start at the uni, run to the racecourse (1/2 mile), run to the end gates (1 Mile) and into the park. The lovely council have put a load of exercise machines around the park which have been ruggedised to prevent chavs from trashing them. There is around 7 'stations' but we add things too like, burpees, press ups, sit ups etc.... We try to sprint to each station which are around 50m apart. Then we do bear crawls up and down small slopes, planks and then run back to uni via the racecourse (1.5miles). So along side the circuits, we have also done a 3 mile run!

Stair runs: Once a week i pack a rucksack with a few bits and bobs to add some weight and get down to the racecourse stands and go running up and down them. This is great for developing leg muscles and general cardio fitness for getting up and down those hills. It's pretty hard, and if i dont feel tired at the end i go for a bit longer, i try to build up the weight and pace each time i go.

Indoor Climbing: Every tuesday the UWCMC try to run a climbing wall session for members where we instruct on belaying, tying in, harnessing up and general climbing stuff for new members. These little sessions are run by SPA qualified and trained people from the club. When i'm there i try to use a pair of fig fours on the hardest route i can get away with. This is great for muscle training. If no fig fours, then i climb with ankle weights, this is something i think will be good to get used to having heavy boots on...not to mention how knackering it is! We have now been given permission to use the wall's indoor dry tooling wall, so watch this space an update on that.

Hill walking and climbing: As much as i can i try to get out into North Wales for some hill walking, scrambling or climbing to see if my training is paying off, but i havent been for a while , so watch this space.

I've tried to talk about the stuff i do each week, but you should try and come up with your own training programme that works for YOU.

Saturday, 19 November 2011

Getting ready for Winter pt 1: Kit

Hi there,

Havent posted in a while, have had a lot on at work and now back at university. Just thought i'd do a post on how im getting kitted up and preparing for winter.

Firstly, i've got a wonderful beard 'on the grow'. For no other reason than to have some fantastic pictures of a frozen face!

Kit wise, ive replaced my DMM flys with a pair of old school DMM Xenos (left), replaced the picks and bolts on them so theyre in full working order now. They also came with triggers pre-attached which i was pretty chuffed about. I was going to buy some of those Cassin X-Grips for the shafts, but i didnt fancy paying £20 a piece for them, so i just bought some skateboard decking tape which is basically glorified sandpaper which should give a bit better traction when going for a high grip. I also bought a Grivel Springer Leash for when im leashless.


 Last winter i used my Mountain Equipment Kaniq as a belay jacket, however, although it was warm, it was HUGE! Because its a Gore-Tex insulated jacket, it doesnt pack down especially small and therefore takes up half a pack! I was looking at an ME Fitzroy as a replacement, but i opted for a down jacket over another synthetic purely for warmth. I went for the Mountain Equipment Lightline, but the newest blue version with orange zips - which worked out cheaper than a fitzroy anyway. This packs down redonkulously small for such a chunky jacket. But it also retains a somewhat fashionable appeal, so just as suitable for the apres-ski as in the mountains. It is supremely warm too, these cold, hungover mornings walking to lectures are so much easier in it. Cannot wait to try it out properly.

I replaced my aged Scarpa Mantas back in May with a pair of La Sportive Trango S Evos, which are superb. The comfort of these boots is beyond words. They are just as at home on grade III scrambles as on gentle walks in the Peak District. However, as these are a B1 boot, they are not suitable for winter mountaineering; so i had a problem. I have massive feet. So finding a pair of winter boots that fitted me properly was a challenge. However, after a bit of internet research, i found Outside in Hathersage stocked my size in all the boots i was looking at. I dropped in on a day off from work and got sized. I tried Asolo AFS8000, Scarpa Vegas, La Sportive Nepal Extremes, Scarpa Phantom Guides, Scarpa Mont Blancs and the brand new Mammut Nordwand TL.

The AFS8000s were too small and i couldnt get my foot in the shell with the inner boot on, so they were crossed off. The Vegas were stupidly cumbersome and heavy, so they were crossed off. The Nepals didnt fit my foot shape due to them being very narrow at the back. The Guides werent as confortable as i'd hoped and for the price i wanted a pair i immediately liked. The Nordwands were amazing; comfy, supportive and good looking. But due to the price, the were crossed off the list. Which left me with one of my favourites from the off, the Mont Blanc (left). They were supportive, comfy, very agile and not at all cumbersome, plus; i love the orange. They are a brilliant boot and at £360 RRP, rather pricey. So having found them cheaper elsewhere after buying them, Outside refunded me the difference. The experience of boot shopping there was very good, the staff were so professional and had great knowledge.

I have more articles coming....so watch this space

Sunday, 2 October 2011

"Outdoorising" your Android smartphone

2 years ago I reviewed the Airo A25 at the time the idea of a unit that could view ordnance survey maps, send and receive emails, view word documents, and make calls seemed like a dream come true for any outdoor instructor. Technology has come a long way in 2 years, and the technology that was once available in a few elite pieces of hardware like the Airo, has now spread to smart  phones owned by many people world wide. Thing is, many outdoor enthusiasts are simply not aware of the potential the smart phone has to assist with their activities.

I recently upgraded my phone, loving technology as I do I was desperate to escape the Landrover S1 and its complete lack of features. When it came time to upgrade I chose the most up to date, feature packed, gadget full phone I could find; The HTC sensation. The sensation appealed to me for a number of reasons; 1080p video camera, high speed internet, solid aluminium construction, to name but a few. Having had the phone for a week I have been slowly getting to grips with how it works and what it can do. Through downloading a few apps, transferring data, and buying a few accessories I have turned the humble smart phone into a toughened outdoor unit, and this is how...

Toughening up the phone


One problem with Smart phones is that they are so expensive you just don't want to break them. The smooth glass screens, and delicate feeling body means you worry even putting the thing in your pocket, never mind jamming it in a rucksack for a day on the hill. After a bit of research online I settled for a "CaseMate Tough" case. This case was the most reasonably priced, and most easily available on the market, and comes with specialist versions for most phones. What I would say is that you should do some shopping round for a case that suits you. Most tough cases (Trident, Otterbox, CaseMate etc), come with 3 layers of protection. The first layer is a silicone skin that fits close to the phone, this takes the shock out of an impact should you drop it, the second layer is an ABS plastic layer that protects against damage from the impact. The 3rd layer is a screen protector that goes over the screen to prevent scratches and damage to the phones screen. Buying one of these cases will provide damage resistance to the phone from drops and impacts. It does not provide any waterproofing however. There are a number of companies that make waterproof phone cases for some models, Krussel being a key example, albeit providing expensive options. For me; I just about a small dry bag. So after a new case, and a dry bag, but phone is armoured up and waterproof, great!

"Outdoorising" the software


Getting software for your Android phone can be a potential minefield, with every Tom, Dick, and Harry trying to get a piece of an ever expanding marketplace by designing (and charging for) apps that they feel fill a gap in the market.

Fortunately I have navigated this minefield for you! Below are a few apps that will turn your phone into a lean, mean, outdoor machine!


1. OS Atlas for Android


OS Atlas for Android comes in 2 versions; a free one, and a premium one, the latter costing £1.99. From the outset I will say this app requires a data connection so is not ideal for anywhere not in range of a 3G data connection, however what I would say is that you will struggle to find any application that will provide offline OS maps (Believe me I tried!). This app provides OS mapping at 1:10000 (streetmap), 1:25000 (explorer), and 1:50000 (pathfinder) scales. It also uses the phones GPS to locate you accurately on the map. If your phone doesn't have GPS then don't waste your time and money downloading this as the accuracy can be anywhere from 10m to 40m. With this app you can zoom and pan easily with the phones touch screen, changing the scales as and when you want. There is a daily data limit on the free version, meaning you can't download infinite amounts of maps, if you pay £1.99 for the premium version however this is not present, and neither are the annoying adverts at the bottom of the page. I have downloaded various apps that do the same thing and this is my favourite and most accurate one, it also caches the maps you use making it much faster, others I have downloaded don't seem to do this. £2 well spent!

2. MM Tracker


For anyone who already has Memory Map, this is a god send. This app allows you to install your Memory Map maps onto the SD card of your phone, meaning you can navigate, track routes, download tracks, and view saved files from your PC, and the best part? It can all be done offline, meaning no data connection is required. Naturally this has the huge drawback of having to own Memory Map map files to begin with, however if you already have them (like I do) this app means you can have all the features that Memory Map pocket edition does, but on your Android phone. At present Memory Map are creating an Android version of the pocket edition (see this)however so potentially it might be worth saving the £6.99 this app will set you back, and just get the free version for the time being....Still at the moment this is the best navigation app out there, provided you already have maps!

3. iGeology


For any outdoorsy types out there that have an interest in geology, whether you are a student, mountain leader, or just have a passing interest, this is the app for you. First of all it is provided by the BGS (British Geological Survey) free of charge, and provides full UK geology coverage, at a variety of scales down to 1:50,000. Tapping an area on the map will bring up a small box detailing the type of geology shown, as well as linking to any geology reports online. The geology mapping is overlayed on OS 1:50,000 mapping, making it an amazing tool for outdoor instructors wanting an "in the field" guide to geology. You can search for places by postcode or grid reference, and using the phones GPS the app can track your current position, allowing you to check the geology as you go. The main problem (as with many mapping apps) is that it requires a data connection to download the maps you need. Outside of that this is a truly brilliant app, which provides a wealth of information on UK geology, and all for FREE! Brilliant!

4. GPS essentials
Another nice little free app, albeit with annoying adverts at the bottom. This one does what it says on the tin. It provides a number of screens which provide useful GPS tools. On the left is the most useful screen, providing data on a number of things. There are other screens the coolest of which is one that uses an augmented reality view from your camera to display you current waypoints (http://www.appbrain.com/app/gps-essentials/com.mictale.gpsessentials). It can also provide charts of speed, elevation and other data, which can be useful for analysing your route on the go. Using waypoints you can easily track a route, and get back to a location in the event of an emergency!

This really is a useful little app, and as a bonus it works offline and doesn't require a data connection. Overall it's a great app to have, it's free, and doesn't need internet! Go for it!


5. Mountaineering by SusaSoftX

This last app is pretty much just an eBook. But it's a useful one, some of the information in it isn't necessarily the most up to date or modern, but for information such as weather, avalanche testing etc, it's a useful free reference tool, and well worth a free download!


Well that is it for now, hope this has been useful! Any feedback on this would be much appreciated, Android is new to me as well, so if anyone has any hidden gems out there then please drop me a line! Chris@electronicmountainleader.co.uk

Long time no post!

So I haven't posted anything for a couple of months. For me it's been a busy period, and a lot has gone on. Firstly and most significant is a change of job. I did my last day at Stanley Head on Friday, and will be starting a new teaching role on monday. I will still be doing the odd evening, weekend, and holiday work at Stanley, but for the most part I won't be around there much. I will be keeping my  DofE award officer job alongside the new one, so I won't be completely apart from the Outdoor Education scene. Being in teaching will give me a) more money and b) more holiday to work towards my MIA and winter ML. I will miss Stanley, in particular the awesome kids who come through each week, but it was time for me to move on with my career.

Anyway I'm back, so time to get some more articles up.....watch this space.

Wednesday, 27 July 2011

Polartec NeoShell vs Gortex Active Shell

At the OutDoor show 2 new fabrics were being shown. Polartec was demonstrating their new waterproof and breathable fabric, whilst Gore-tex was showing their latest addition; Active Shell. Naturally it is difficult to give a detailed review of a fabric I haven't worn or used on the hill, however this review contains my personal first impressions of both fabrics.

Polartec® NeoShell

As I mentioned in the Mammut Eiger Extreme review below, I was very impressed with NeoShell for a number of reasons. NeoShell represents a very odd combination of feeling and performing like a soft shell, but bringing with it the waterproof qualities of a hard shell. In particular my favourite jacket with this fabric was the Mammut Gipfelgrat jacket (see review further down). I can already see the benefits of this fabric for winter climbing, the fabric has stretch in it to give great comfort and freedom of movement, it's warm like a soft shell, but gives protection from the weather like a hard shell. On the Polartec® stand was a short demonstration of how the fabric works:

As you can see the fabric is fully breathable; allowing oxygen to pass through it into the liquid, however non of the water above gets through the fabric into the container below. The fabric in the right hand container was not named, so could be anything. NeoShell also claims to be machine washable without any loss of waterproofing on the jacket - another big claim that can't be substantiated at this stage. The other thing about NeoShell is that it seems like more of a 'beefy' fabric, it's not designed to be super light weight, so from an adventure racers point of view this fabric could be less that ideal. Full details of NeoShell can be found on the website: http://www.neoshell.com/
Overall I was very impressed with NeoShell, the neat little demo on the stand, the substantial feeling fabric, the proof will be in the pudding, but if NeoShell delivers what it promises then this could represent a real step forward in terms of performance fabrics.

Gore-tex® Active Shell

Active Shell is the latest fabric from Gore-tex designed to provide a high degree of waterproofing and breathability. From Gore-tex;

"Ideal for all weather fast forward athletes seeking durable protection and comfort during highly aerobic, done in a day activities such as trail running, mountain biking, and fast alpine ascent."

(Left) Mountain Equipments new Firefox jacket uses Active Shell

My first impression of Active Shell? It felt like Paclite crossed with ProShell. It felt very thin, and light. I found it hard to get very animated about Active Shell, because from my point of view it is just another Gore-tex fabric that is waterproof and breathable. I also had to sit through a lecture one morning that was supposed to be about outdoor gear targeting the ageing market, however when the Gore-tex woman appeared to do her section, she just talked about the various fabrics available instead of staying on topic, however listening to her all the fabrics made the same claim: waterproof and breathable....so what exactly is new about Active Shell? From Gore-tex website:

"combines extreme breathability and durable wind- and waterproofness with minimum weight and pack volume."

Sound familiar? Thats because the above was taken from the description of Gore-tex Paclite. My point is that Gore-tex new fabric just seems to me to be "just another waterproof fabric".  4 of the 5 fabrics on the Gore-tex site claim to be waterproof and breathable, and on feeling and trying on Active Shell jackets, it feels like another one for the collection; an updated version of Paclite, that perhaps provides slightly more breathability and waterproofing, however once again the proof will be in the pudding. Website: http://www.gore-tex.co.uk/remote/Satellite/content/product-technologies/garments/active-shell

In summary; I am finding it very hard to get psyched for Active Shell, I'm sure it will be a step forward in terms of producing a shell that is; lightweight, breathable and waterproof. But to me it just seems like it's nothing new. NeoShell on the other hand seems to be exactly what I have been looking for in a soft shell, but with the added bonus of being as waterproof as a hard shell. I was impressed with NeoShell to the point that I gave V12outdoor an email this morning to see about pre-ordering a Mammut Gipfelgrat in September.

Thursday, 21 July 2011

OutDoor show Friedrichshafen 2011 - New electronics

Naturally I was keen to get some info on the latest GPS sets out there. I focussed on getting info on the main 3 GPS brands available in the UK; Magellan, Garmin and Satmap....

Magellan eXplorist series

The eXplorist series are Magellan's latest GPS handsets, as well as being available to view and trial at the Magellan stand it was possible to borrow one and test it out. The eXplorist series comes in several models; GC, 310, 510, 610, and 710. All the models

have a loop at the bottom to attach a lanyard (useful feature), waterproof to IPX standards, and include some maps (varies depending on model.

The GC version is designed for Geocaching, and comes with a preloaded database of 1000's of Geocaches. It also comes with a 30 day premium trial on Geocaching.com. It can hold around 10,000 Geocaches. However it does not come with any maps included. The 310 and 510 include world mapping (roads, river, some relief shading, land use worldwide), however the 510 has a larger 3 inch touch screen, and a 3.2 mp camera built in. The 610 and 710 are the 'big daddy's' of the series and both include topographic "summit series" mapping. The summit series mapping is 1:50,000 and includes all the detail you would expect from a map of that scale. The 710 includes turn by turn navigation (US only at moment).
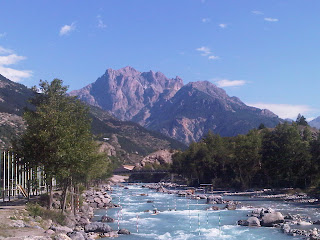
So all in all I liked the eXplorist series, the signal was very constant (even inside the centre), navigation was simple enough using the buttons, I would imagine the touchscreen versions with larger screens would have been even easier to use! Overall, good range of GPS sets, some good features, and the price point is also pretty good.

Garmin eTrex 10,20 and 30

So having visited Magellan the next stop was Garmin and their new eTrex revamp. The eTrex has been a stable GPS in terms of sales and popularity for some time, most likely due to it's ease of use and cost (the eTrex basic model can be picked up for around £50). However Garmin obviously decided it was time for a change around, so their new eTrex series was created. There are 3 models; 10 (£100) ,20 (£130) and 30 (£150). All models have the same interface which consists of a small scroll stick in the top right, and a number of buttons on the sides which control various functions. They all also feature waterproofing up to IPX7 and have a 2.2 inch screen. The pricing is very good, and with only a 33% difference between the top and bottom model's it would definitely be worth considering getting the eTrex 30 for the additional features. The eTrex 10 is a basic model featuring no maps, the 20 comes with a colour screen and expandable memory to allow new maps to be added. The 30 comes with a barometric altimeter for more accurate height readings, a worldwide basemap and a 3 axis compass, as well as wireless sharing for sharing routes between other compatible units. Overall I really liked these units, they were a good size, had good features, good ease of use, and most importantly the price point was excellent (much cheaper than the Magellan units). It should be pointed out however that the Magellan sets include maps where the Garmin sets do not, so factoring in the cost of expanding the maps brings the costs up to around equal. The new eTrex series will be appearing in the UK soon!
The other unit that caught my eye on the Garmin stand (and OutDoor industry award stand) was the Garmin Montana. The Montana is another big daddy unit and comes in 3 versions (600, 650 and 650T) each with slightly different features. The Montana has a massive 4 inch colour touchscreen. The top version is the 650T, which includes a 5meg camera and 100k topographic mapping. It can be expanded to include 1:25k mapping, and is waterproof to IPX7. However at £500+ this is not a cheap option! And when you consider that £500 does not include any 1:25k mapping it starts to look like a very pricey option, especially when units like the Airo A25 are now dropping in price. Despite the price I did like this unit, it felt incredibly solid, the touchscreen was easy to use, and despite the glare from the sun outside, the screen was very clear thanks to the sunlight readable screen. Overall, if you have he money then this unit is great, however not many people would spent £500 on a GPS set!

Last on my tour of electronics was SatMap. Whilst there were no new products from Satmap this year in terms of GPS units, there were a few extra bits that may be of interest to anyone who has, or is thinking of getting a Satmap set.

First up is the ProShield. The proshield is a rugged case with a belt clip. This is designed to bring the Satmap up to IPX7 standard for waterproofing. It protects the unit from drops onto concrete, water and dust, as well as protecting the screen from scratches and damage. It comes in 3 colours (left) and is very easy to fit. The belt clip is also large enough to fit onto a rucksack loop or strap for ease of access. The second thing is that all 1:25k maps from SatMapSatMaps now have new software which increases their efficiency and reduces the chances of the unit freezing. I guess from Satmaps point of view they have decided "if it ain't broke don't fix it!".

So there you are, new releases and updates on the top brands of GPS available in the UK, some good stuff on the way!

OutDoor show Friedrichshafen 2011 - Crazy lightweight gear

Personally I have never been huge on "Super Doopa ultra lightweight" gear, of course I am not adverse to having gear that is lightweight, however I feel the next 3 products will be most suitable for those crazy trail runners who want to carry as little as possible while retaining functionality. The first product is the Mountain Hardwear Ghost Whisperer. This one really does have to be seen to be believed. At 48g this wind shirt is made from 7D nylon fabric which provides a good degree of water resistance. The jacket is incredibly minimalist and has a simple zip at the front. The jacket does come in green which makes it look a little less like a sandwich bag! Very cool product, not for me, however ultralight hikers, back packers and trail runners will love this product.

Speaking of Ultralight; Terra Nova recently announced their new Terra Nova Laser Ultra 1 tent. A 1 man tent that weighed only 495g. The interesting thing about the Laser Ultra was that despite it's lightweight, the fabric used in the tent boasted a high level of water resistance that most other tents. The ghostly clear fabric is so opaque because the fabric is too thin to be dyed. I was impressed with the Laser Ultra, firstly because I like Terra Nova, but secondly because it represents a leap forward in the design and build of tents. When I got to the show I was keen to get my hands on the Laser Ultra, however when I reached the Terra Nova section I was greeted with something even newer....The Voyager Ultra. The Voyager has long been a cracking 3 season tent in Terra Nova's collection, but they have taken it a step further by following in the steps of the laser and creating an ultra light version. The voyager Ultra is much lighter that the Voyager superlite, but just as strong, which is amazing when you think about it. The Voyager Ultra weighs in at 880g (120g lighter than the superlite and 1.1kg lighter than the original Voyager), and is built of the same highly waterproof fabric as the Laser Ultra. Considering the Voyager Ultra is a 2 person tent, the weight of it is just incredible! 

As well as their range of ultra lightweight tents, Terra Nova have produced a range of lightweight
packs. The Ultra 20 (left) is a 20L lightweight pack that weighs a mere 136g (111g without waist belt). Despite it's light weight it still has generously padded shoulders and drawcord closures. This pack is very cool indeed, the fabric feels tough considering how light it is, but at £120 you are paying a lot for the luxury of less weight!

Wednesday, 20 July 2011

OutDoor show Friedrichshafen 2011 - New climbing hardware

So one of the things I was looking forward to most about the OutDoor was the new climbing hardware, and I wasn't disappointed! Walking into the show on the first day a giant poster informed me that Black Diamond were showing their new Magnetron karabiners; definitely worth a look! The Magnetron system is currently in 2 different karabiners; the grid lock and the rock lock. The concept is simple; 2 small magnets hold the gate closes in the same was the screw does on a screw gate. When the user squeezes the green pressure points on the gate the karabiner can then be opened. Simple concept, very easy to use, and very innovative. Really liked the karabiners, they felt very solid and the Magnetron system was very easy to use! 10/10 for something new!

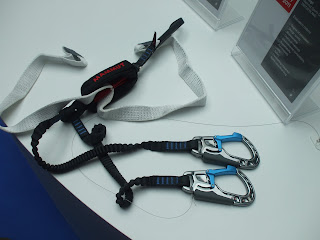
Next up is Mammut's new via ferrata set; the Tec Step Bionic. The system builds on Mammut's previous climbing hardware "Bionic" products. The karabiners look great as with other products from Mammut, titanium grey and electric blue karabiners, and black lanyards. The karabiners use a new locking system where the back bar of the karabiner needs to be depressed before the gate will open. This is not a unique system, and similar products where shown from a number of other companies. But out of all the similar sets shown, I liked this one the best! See short video below on how this product works.


Petzl demo'd the new Reverso4 also. The Reverso4 is not very different to the Reverso3, it has the same function and design at the 3, the braking grooves etc are all the same. However the 4 is an ultra lightweight version, 25% lighter than the previous version. However all in all there isn't anything different! One product I was impressed with was Climbing Technologies Alpine Up. This is a new version of CT's Click Up assisted braking device. The new version is capable of providing the same function as the Click Up, but with double or half ropes. The device is multi purpose and can be used for belaying on a single rope, belaying on double or half ropes, and abseiling. While not a huge brand in the UK climbing technology continue to produce innovative new gear, and the Alpine Up is no exception.

The last product that caught my eye  was Beal's Diabolo rope. Chatting to one of the sales rep's on the Beal stand, he explained that the rope used a unicore system. What this does instead of being a traditional rope with a core and a sheath, the 2 parts are bound together. The idea of this being to illeviate rope slippage and increase the rope lift. Another example of a great new product!


There were a number of other climbing related gear releases including new DMM rebels (they have different handles in the 2011 version), a new climbing helmet from Edelrid, and many many more.

OutDoor show Friedrichshafen 2011 - Mammut Eiger Extreme

One of the things that caught my eye most at the show was Mammut's new range for Autumn 2011 called the Eiger Extreme series. The range has been constructed to celebrate 150 years of Mammut, and I have to say I was very impressed. The range features a number of items; jackets, boots, hard shell's, soft shells and more. The whole range uses every fabric and technological advance available to create a no holds barred set of technical clothing. First off I love the colour scheme, I think the orange/blue/black combination looks incredible, if a little similar to Adidas's new gear...

The first product that really impressed me is the Gipfelgrat Jacket. (right). The jacket is one of the first to use the new Polartec Neoshell fabric, I was very impressed with the demo going on at the Polartec stand, which showed the waterproofness and breathability of the fabric. The jacket itself feels incredible; the fabric feels tough and is exactly what I expect from a softshell jacket. There are 2 large front pockets that are high enough up that wearing a rucksack shouldn't reduce the effectiveness of the pockets for hand warming. All the zips in the jacket are waterproof. At nearly 800g this jacket is by no means a lighweight option, however it is my idea of what a perfect softshell should be, and if the claims Polartec have made about Neoshell turn out to be true then this jacket could represent my dream of a perfect jacket! At £390 this jacket is very expensive, but compared to Arcteryx for example...this is fast becoming the standard price tag for high end technical jackets.


Next in the series is the Nordwand TL boot. This boot was nominated for an OutDoor industry award, and when holding it I can see why! The boot is very well designed and includes an integrated gaiter similar to that in the Scarpa Phantom. It has a strap around the top of the boot to give addition security, a diagonal waterproof zip, and loops inside the boot to aid with putting it on. Of course these are first impressions, but to me the boot felt like an excellent B3 mountaineering boot, however I expect the price tag will reflect the quality of the build! But overall I really liked the Nordwand TL and hopefully will get chance to try them on at some point in the not too distant future!


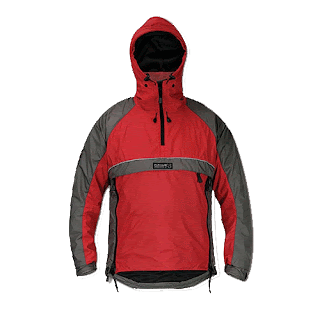
The last item from this series that I liked was the Felstrum smock. The jacket uses the new Gore Tex fabric ActiveShell. The jacket is a lightweight alpine smock, featuring a half zip, a helmet compatible hood, pit zips, and a bright orange colour ideal for use in bad conditions. The fact that Mammut have constructed a jacket that uses ActiveShell as well as one that uses Neoshell really does show they are making uses of all the current innovations to create a varied collection of technical clothing. I spent around an hour looking at the whole series, and I have to say that in my opinion there wasn't a "weak link". All the collection has been built to an incredibly high spec, and there have been no compromises on quality at all. However they are likely to have high price tags attached. Do I care? No, I have already started saving up to get a Gipfelgrat jacket, as it was without a shadow of a doubt my favourite piece of gear from this years show.

OutDoor show 2011 - wow

Well me and Si are back grom Germany. We actually got back early tuesday morning (2am). However I then went out again at 8am on expedition. Having successfully guided another 85 talented young people through their DofE I am now back, brew in hand, and I finally have some time to reflect on my few days in Germany.

First of all, it was everything I had hoped and more. The whole atmosphere and buzz around the place was incredible, and it was amazing to be a part of it. Not only did I get to see the latest gear months before it will appear in the marketplace, but I also got chance to meet Ueli Steck and Dave Macleod, both cracking guys! There were climbing compeitions to watch, movie nights, parties, lectures, breakfast meetings, and tonnes of gear!

Over the next few days I will be putting together all the information I gathered so stay tuned!

Tuesday, 12 July 2011

The OutDoor show 2011

The time has come, bags packed, camera charged, German revised, and tickets printed. Simon and I will be making our way down to Gatwick tonight at around 11pm. Simon has only just arrived back from the Alps so our journey down to London should be interesting! Our flight leaves the UK at 0700hrs, and gets into Zurich, Switzerland around 0950hrs. We will be meeting Juho at the airport and making our way accross the border into Germany. We will be spending the duration of the conference camping, and hopefully making some new friends. Needless to say both of us will be involving ourself in as much of the show as possible. From a personal point of view I will be attending some (not all) of the main lectures, the Polartec party, the movie nights, climbing competition, as well as visiting as many of the stands as possible! I will be adding as much content onto here as possible, me and Si are hoping to do some blogging while we are there, but the majority of content will be added once we get back. A big thanks to Juho and Tribevine for making this possible, hopefully we will contribute enough content to Tribevine to repay the kindness we have been shown. A big thanks also to Mark and Paul Dix at the Outdoors Company for providing me, Simon, and Juho with high quality North Face polo shirts embroided with the Tribevine logo. To everyone who reads this blog; watch this space....

Wednesday, 6 July 2011

Outdoor centres: making local walks more engaging

Outside of DofE work I often lead groups on short local walks and expeditions around the centre as part of their week long residential. The format for these days is usually;

Brief group
Walk to lunch spot
Cook and eat lunch
Walk back to centre

From an instructor point of view there is a huge variation in the skills and level of understanding of the groups that come to the centre each week.  Some of the young people grasp the fundamental concepts of map reading, navigation, and cooking very quickly and easily. Some however often see it as “not their cup of tea”, at which point it’s up to the instructor to engage them in any way possible. New technology can provide an additional tool in the instructors “toolbox” when teaching local expeditions and walks. If we look at each of the above 4 sections:


Brief: I have seen a number of briefs on expeditions over the time I have worked in the outdoors. These range from a long droning speech from an instructor steadfastly standing at the front of the room, to an animated and concise brief that captivates the attention of the group with ease. Modern technology can be an instructor’s friend when carrying out a brief. Many centres now have smart boards and projectors equipped in their teaching rooms. This provides the opportunity to use a well-designed PowerPoint to assist with the brief. It is essential that anything that you use is not just simply text on a plain background, there are a number of ways you can “jazz up” a PowerPoint;

1.       Animations: these vary from text flying from one side, to using “Motion paths” to create moving diagrams. For example, I created a diagram to show how to pack a bag. The slide consisted of a black rucksack outline with pieces of equipment round the outside. When you click the mouse 1 piece of equipment would “fly” into the bag in its correct space.

2.       Colours and pictures: using expedition pictures from personal trips that might peak interest in the day. Creating a real expedition feel is important, and well selected pictures and backgrounds can help.

3.       Videos: A short video to talk about something is a good way to keep attention focussed for a short while. These can be filmed yourself, or taking from YouTube or other sites.

Memory map is also an excellent program for teaching map work. The 3D view allows the group to more clearly visualise the route, and also get some data on the route when they get back.
Walk to the lunch spot and back: So you are packed and under way, the key now is to keep interest in the day. Obviously there is a certain degree of teaching and learning to be done during the expedition. However the rest of the time the group will be plodding along, perhaps glancing occasionally at their map. So how do you now keep them interested? One thing I have learned from my time working with groups is this: “Kids LOVE gadgets”. So, on that basis here are a number of ways to keep kids engaged:

1.       GPS sets with real time OS mapping. The lads especially love this. To them the GPS handset becomes some kind of Call of Duty style satellite tracker. However to the instructor it’s a way of getting the group to think about maps, orientation, speed, distance and route planning. MemoryMap adventurer, Garmin Oregan, and Airo units are ideal for this.

2.       Geocaching: The US hobbie of Geocaching made it across the pond a few years ago and has been growing in popularity ever since. From a groups point of view, introducing the concept of geocaching whilst still at base can be a rewarding activity for the group. Using the smart board to visit a Geocache website and choosing a few (pre checked for suitability) caches to hunt can ensure a rewarding and interesting activity. If needs be you can set your own geocaches with small rewards for the group.

3.       Walky talkies: Allocating a few young people to be a “leader team” and giving them a set of radios can really give the group a sense of control over their day. Whilst it doesn’t have much in the way of educational value, it does really keep them interested especially when the leader group can go “recon” a path to check it is right.

4. Simplified maps: Anyone with basic Photoshop skills can knock up a quick map trace to simplify the OS map for younger groups. (See picture below) this map took me around an hour, not finished, but gives you the idea:


Cook and eat lunch: On expeditions, normally a group get the chance to “cook their own”. This usually involves the group (who have been trained to use a stove the previous night), cooking tins of food for the group. This phase of the expedition can be made more interesting in a number of different ways:

1.       Taking a collection of stoves, not just the traditional Trangia units. Personally I take along my jetboil, a hexi stove, and a small gas stove. This gives the group chance to see other expedition stoves, and feel more “in the know”.

2.       Taking expedition food: dehydrated and boil in the bag food gives more of expedition feel. It also gives the group chance to taste “specialist food”.

All in all I think what I am trying to put across it that these local walks form the foundation of a young person’s attitude towards hiking. Ensuring an enjoyable and fun packed walk can provide a positive image of schemes like DofE, and encourage young people to get involved, without the negative memories of “that rubbish long walk they had to do”.

Alpine sunshine

Greetings from the alpine town of argentiere la besse, its around 25degrees with a light breeze and I'm sitting in the sun with a glass of wine. Just had a fantastic day sport climbing on some of the local crags and then a swim in the lake. My tan is coming along nicely.

Have been wearing my La Sportiva Rock Jock shoes all day and my feet have been comfy the whole time. They stick to the rock perfectly and the technical toe and sides has been a god send on some of the 6a's. The rock has been warm and beautiful the climb on.

I've been using my longer DMM phantom quickdraws for the over hanging routes and have been good as usual, I feel however, that something lighter may have been better.

The Petzl meteor helmet has been fantastic in the 35degree heat and has kept my head well ventilated and cool (unlike my grivel salamander). Its light design and vents on the side, front and back allow you to be comfy in it all day if necessary.

My oakley straight jackets have been superb, no glare at all. The sun over here is extremely bright even from early morning.

A quick visit to the supermarket yielded an impressive bounty of 24 beers and 5 litres of wine all for 10 euros. Happy days.

Au revoir for now
Sent from my BlackBerry® smartphone

Thursday, 30 June 2011

More expeditions

Haven't had chance to write anything for a little while now (saving myself for OutDoor perhaps!). Sadly I haven't spend my time absent from writing on here doing anything other than work! I have been on a total of 3 expeditions over the last month, so busy times! Last weekend was the practice expedition for a group I have worked with since September, and they are excellent guys and girls to work with!

This was also Si's first expedition in the DofE world so a chance for us to team up away from the centre for a change. We packed pretty heavily taking a mountain of equipment including multiple stoves, 2 climbing racks (incase we got a bit of spare time to sneak off to Windgather), and tonnes of other gear. We were lucky enough to have a well equipped Landrover Defender as our vehicle for the weekend. After loading the gear up we headed into Leek to get some food for the weekend, then headed out to the Peak. We met with our group at the agreed start point (the Winking Man pub) and then headed out. The weather held until we reached the campsite when a gentle drizzle descended, soaking everything. Not to be discouraged we set up camp and waited for the groups to come in. After everyone was safely in camp we set about cooking the most ambitious meal I have ever attempted on a camping stove; a lamb tagine with cous-cous. The end result was very tasty!


Day 2 rolled around and overnight the winds had all but destroyed a tent being shared by 4 of the lads (see right). The tent had been well pitched however the problem with large family tents like the one in question is they act like a giant wind sail, and sadly this tent came away the worse for wear. During day 2 I was walking with a small group for half a day then leaving them to it.  All of the group were students I had taught previously at bronze level, and I was impressed to see how their skills had developed since they first started. They confidently navigated from Gradbach to Three Shires Head, and over to the Cat and Fiddle. At this point I rallied up with Si and left the group to continue on for the rest of the day alone (having been satisfied of their navigation skills). The remainder of the expedition was spent making our way to checkpoints and checking the group were ok. The rain stopped on the 3rd day, and gave way to some nice sunshine for a change. A brief emergency at Goytsclough quarry meant me and Si had to drive a guy to his car at Pym chair as he had recieved a call that his father had been taken into hospital and needed to get back home asap. Aside from that there was no major drama!

All in all pretty standard stuff, and nothing exciting I'm afraid, I do however promise that in a couple of weeks time there will be a wealth of interesting content fresh from OutDoor!

Tuesday, 31 May 2011

Eco Gear: Given the green light?


This is my first article on here, so i thought i would do an article on green outdoor gear. 

The easiest and most effective way to be a greener consumer is to buy less stuff. Yes, many of us are gear junkies who love to try out the newest equipment and clothing, but before making any gear choice (green or not) you should consider whether you really need an item or if you already have something that does the job safely and effectively.

When you do need a piece of clothing or gear, look for items that contain environmentally-friendly materials, like recycled polyester and plastic and natural fibres such as bamboo, modal, hemp, coconut, and organic cotton and wool. Some environmentally-friendly outdoor clothing brands to consider include Patagonia, Prana, GoLite, Marmot. Finding environmentally-friendly technical gear is still very difficult; with clothing, look for products that use recycled materials and fewer chemicals. The outdoor industry is talking collectively about eco issues and will hopefully develop product standards and ratings for the benefit of concerned consumers.

If you can’t find a green version of the clothing or gear you need, remember that buying a high quality, dependable item that will fit you and your needs for years to come is preferable to buying a low quality piece that you’d need to repair or replace sooner. Read our reviews, visit sites such as Tribevine and think your purchases through before rushing into buying.  
Also, whenever safely possible, have gear professionally repaired rather than buying a brand new version. Tents, backpacks, clothing, and footwear can often be repaired, altered, or resoled by experienced specialists such as Tundra Repairs in Washington, near Newcastle-upon-Tyne.
Still usable gear, clothing, and footwear also can be bought and sold second hand on eBay and my personal favourite, UKClimbing. You could also donate to a charity shop, or pass it on to a mate or family member. 

Some companies will take back old garments, such as with Patagonia’s Common Threads Garment Recycling with which they recycle worn out fleece, both Patagonia and Polartec, and also their own organic cotton t-shirts. 

 However, according to Mark Held, Secretary General for the European Outdoor Group, the cost of our equipment is set to rise due to the growing environmental crisis. This is apparently due to manufacturers passing the cost of environmentally friendly fabrics and fabric recycling onto its customers. 

What "green" gear is on offer? 

Here is a select few.


Patagonia R1 Full Zip Fleece
Made from Polartec Powerdry, which is
made from 60% recycled fabric from
Patagonia’s Common Thread Recycling
Programme. RRP £100


Paramo Velez Adventure Light
Made from Nikwax’s long lasting
Analogy fabric which won’t leak, even
when punctured. It is also stitched by the
Miquelina Foundation, which provide ethical
production in Columbia. RRP £190


Patagonia Nano  Puff Pullover
Windproof and water resistant with the shell
and lining being made from 100% recycled
fabric, again from Patagonias CTRP.  RRP £130


Watch this space for more on this topic in the near future. 

Monday, 30 May 2011

Budget Hill gear.....false economy?

Budget hill gear has been around in supermarkets and pound shops for years, but is it any good? Once upon a time I would never have considered buying anything that was considered 'budget'. Budget outdoor gear was discussed in hushed tones throughout the outdoor community for fear of being branded a 'cheapo'.However times have changed, and after recently purchasing a small trowel for my wild country toilet kit at a cost of £1, and it actually being good, I decided to investigate further. Over the last few months I have investigated and researched a number of products, and produced a list of my top 10 items;

10: Poundland “Camping Kit bag” From Outdoor Solutions
RRP: £1
The camping kit bag, is a large 10L stuff sack with a drawcord closure. For £1 it is constructed from tough material and certainly not thin and flimsy. This might be of some use for someone looking for a small stuff sack to store kit separate from the rest of your gear, e.g:  stove and cooking bits. Available in your local Poundland.

9: Lidl “Flexible camera tripod”
RRP: £5.99

Whilst not strictly hill gear, this little tripod seemed worth a quick mention. This small unit is essentially a flexible tripod for those people who do not want to pay £30 for a Gorilla-pod. The flexible legs mean you can wrap it round trees, railings or anything else you want. This is suitable for small cameras only, I definitely would not recommend anything bigger, for example a large digital SLR or video camera. It has a standard  tripod screw fit so should be compatible with most digital cameras, if in doubt check underneath your camera, and if your camera has a tripod attachment it will have a small indent with screw threads inside.

8: Wilkinsons “Deluxe Compass”
RRP: £2.28
This compass is well built and surprisingly solid given that it only costs a couple of pounds. The bezel has a smooth action, and the notches in the bezel make it easy to grip even with gloves on. The compass has basic features including; a roamer, and glow in the dark points for easy use in low light. Definitely worth looking at if you want a very cheap backup compass.

7: Aldi “Polarised Sunglasses”
RRP: £3.99
These sunglasses are definately good value for £3.99, and polarised lenses mean no glare. These are actually designed for use while fishing to protect from reflection off the waters surface, however they would work just as well for use on the hill if you were after a pair of polarised sunglasses on a budget. What I would say is they seemed quite a tight fit round my head so definately don't buy these blind. Worth noting however that I have a big head.

6: Tesco “Micro-lite Mummy Sleeping Bag”
RRP: £14.67
This little sleeping bag is ideal for anyone looking for a  lightweight summer sleeping bag. With an extreme rating of +1oC they were perhaps a little optimistic, I would estimate around the 5 oC mark is a more sensible rating. However at 800g it is light, it packs down very small, and is ideal where you are looking for basic functionality and minimal weight. I would be willing to use this in sub zero temperatures if worn in conjunction with a good set of thermals.

5: Poundland “waterbottle and karabiner”
URL unknown
RRP: £1
This item is not currently available online, however a quick browse in your local Poundland and you should be able to find them. It is a metal 'sig' bottle with a small karabiner included. Ideal for fuel or for water, and at £1 they are a good solid little bottle. The bottles hold 500ml so they are huge, but for £1 you could buy a couple!

4: Poundland “karabiner washline”
RRP: £1
This is a good little addition to any outdoorsman's kit. The karabiners on each end of the elastic allow for easy attachment to tree's, tent's or car's to create a makeshift washing line to dry wet kit.

Now we come to the top 3 budget hill gear items. These 3 items I feel are the best cheap pieces of hill gear out there.

3: Tesco “65L rucksack”
RRP: £25
This rucksack is the most expensive of all the items in this test. However I believe the higher cost is reflected well in the features the bag has;
Firstly the bag is very well built, it feels tough. Whilst the website says it is made of polyester, it is actually reinforced with cordura at several important points throughout the pack. This makes all the difference in the quality of the bag, as the main areas where the bag will recieve wear and tear.
Secondly, it is a very simple design but includes all the features you would want from a basic expedition sack; compression straps on the side, central taped seam zip for easy access into the bag, good padded straps, and a good waist belt. I recently assessed a Duke of Edinburgh's Award expedition where all the candidates were using these bags. This gave me a chance to 'test drive' one and see how it felt, I have to say, it’s a good rucksack especially for £25, well worth looking into if you are trying to kit yourself out on a tight budget.

2: Poundland “Camping pillow”
RRP: £1
This has proved to be the best £1 investment I ever made! You aren't buying a pillow, far from it, your £1 investment will reclaim hours of lost sleep, and save you the discomfort of a stiff neck every time you go camping. Gone are the days where I am forced to loosely stuff clothes into a stuff sack to try and make a pillow. This beauty inflates in a couple of breaths and is unbelievably comfortable and really does make all the difference. It has a velvet feel meaning its very soft to lay on. It even has a little notch that lets your head nestle into the pillow for an excellent nights sleep. For £1 you will not be disappointed!


 .....and the number 1 item on my review is……


1: Aldi “Altimeter Watch”
URL not available
RRP: £19.99
And here you have it, a watch with all the features of a Suunto Vector, at 10% of the cost. The Aldi expedition watch has the following features:

Large easy to read LCD display showing:
- Time (12/24hr format)
- Month and day
- Alarm with snooze function
- Altimeter with trip timer
- Electronic compass
- Temperature (°C/°F)

In addition the watch comes with a spare battery and a 5 year warranty. The materials on the watch feel really good, and not at all cheap. The altimeter is usually off by around 100m, and needs recalibrating during the day to ensure accuracy. The thermometer follows the trend of other expedition watches by not functioning correctly whilst on your wrist. And the compass is ok, not accurate enough to walk on a bearing with, but good enough to give you a general bearing when walking. What I would say is the gadgets on the watch and the cost of it, means that they are like gold dust to find. Aldi sell these twice a year (from experience) and when they do, they sell out quick, so keep checking in, sign up to Aldi’s newsletter, do whatever it takes, but if you are looking for a budget expedition watch, you can’t argue with £20 for all the features this watch provides.


In conclusion, some cheap gear out there is better than you think. I’m not sure I would rely on essential kit like waterproofs just yet, however there are definitely some great products out there for very cheap. Well worth looking into. It is however worth bearing in mind that to bring you these 10 good quality products, I had to trawl through a number of useless bits of gear, so treat everything you buy in the budget range with a bit of caution before trusting it fully!

Next time: high quality gear at low prices.....is it possible?